Digital Illustration
(Part 1) INSPIRATION & FOCUS
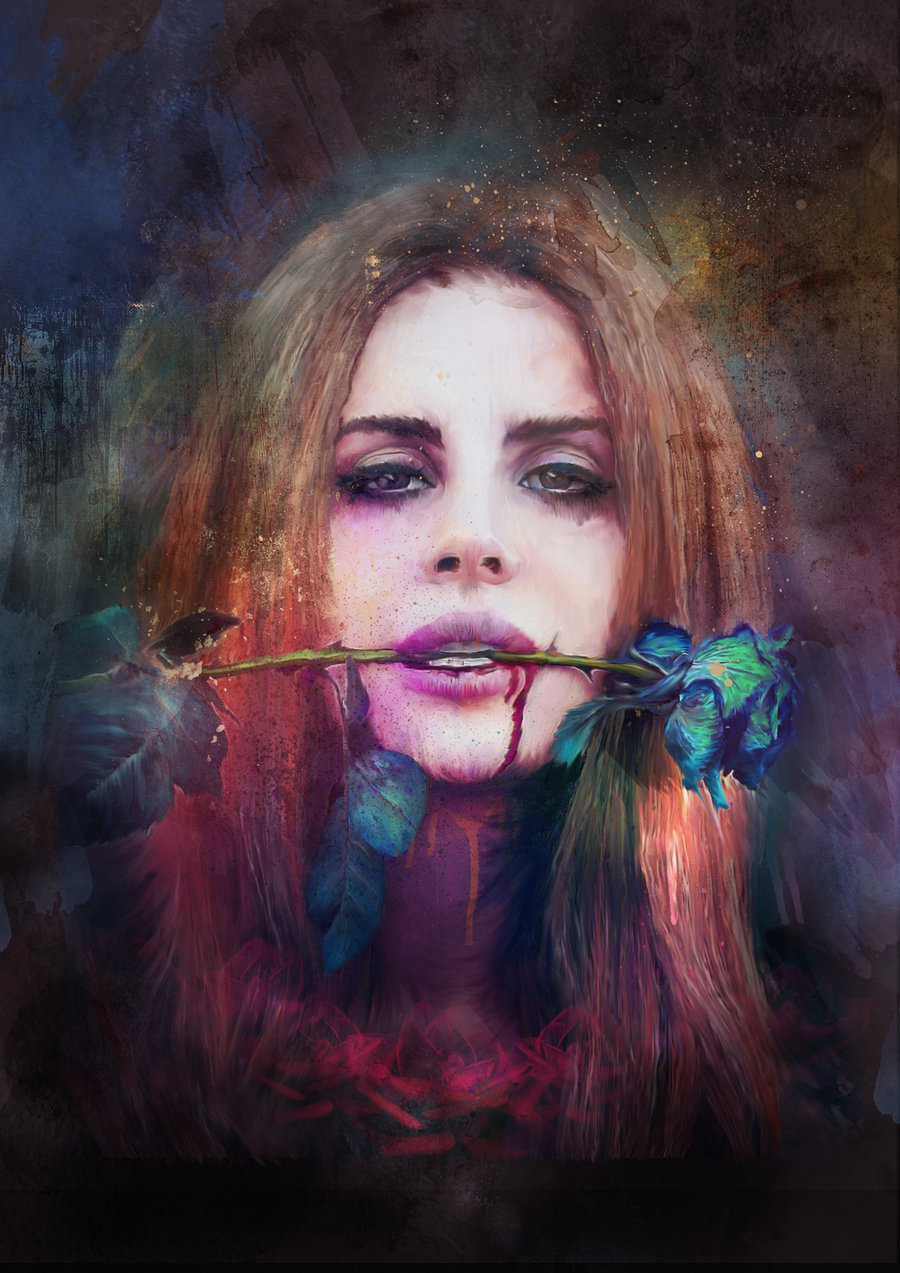
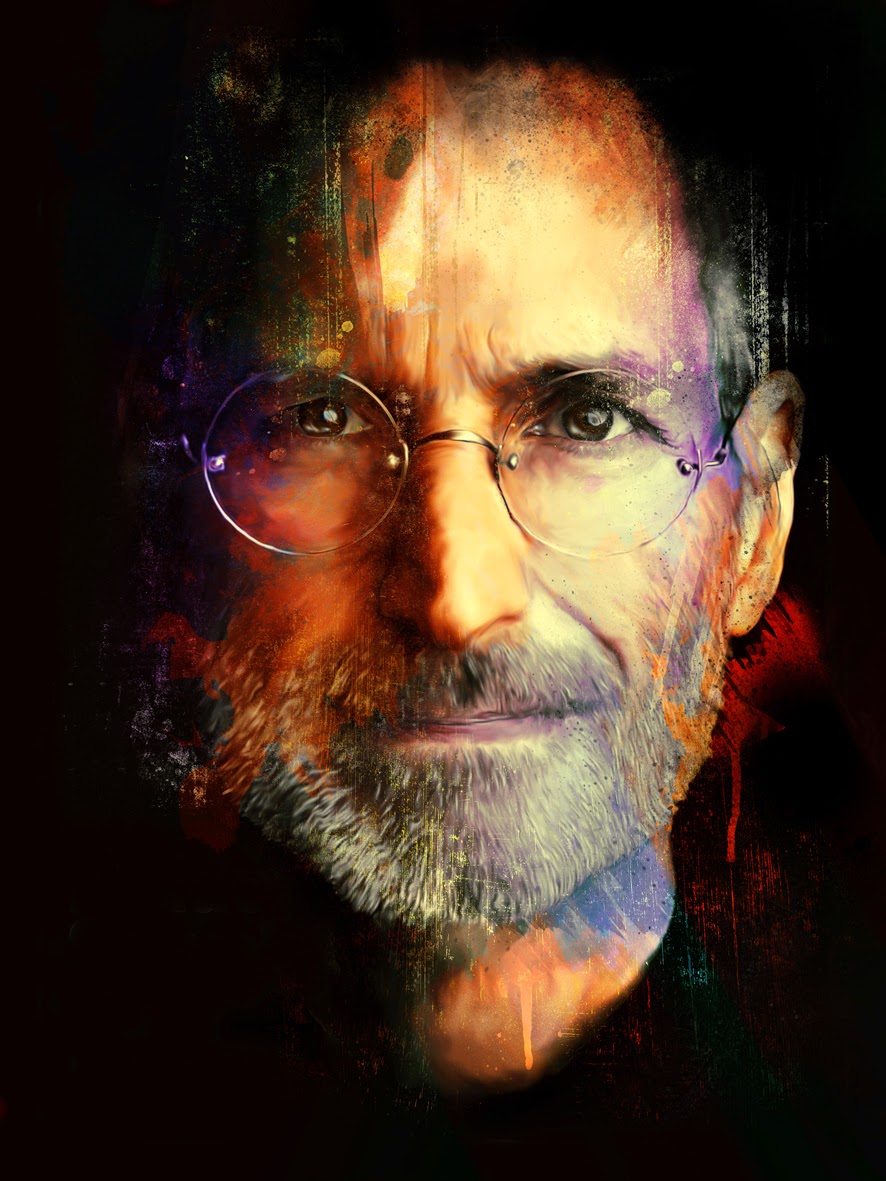
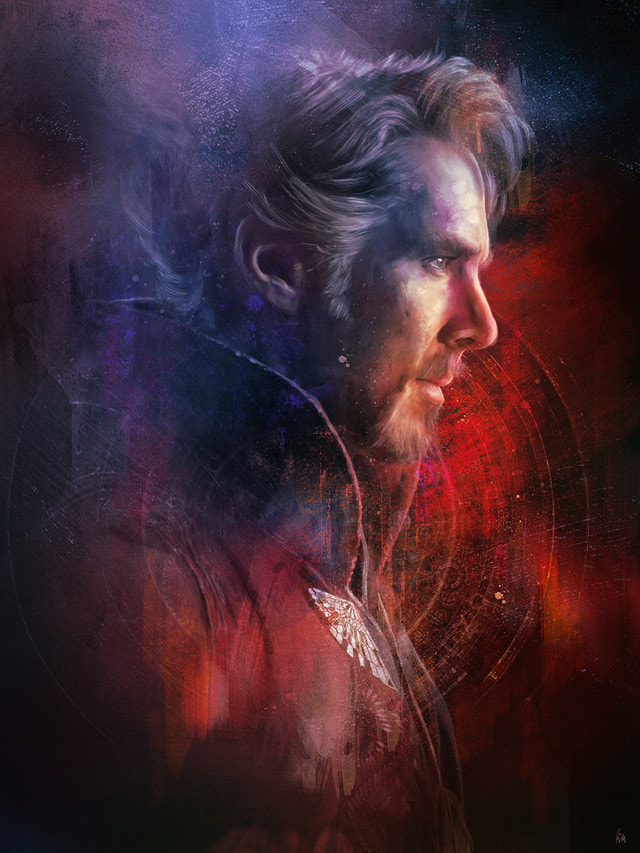
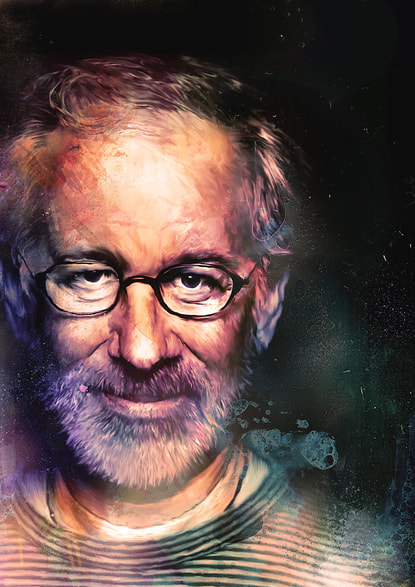
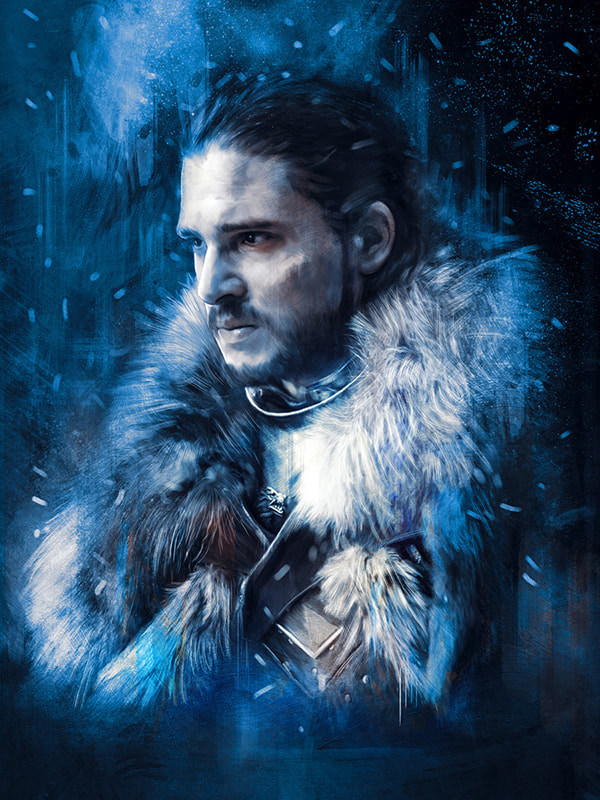
THE ARTWORK (Digital Illustrations) OF RICHARD DAVIES
|

|
View the Behance Gallery of Richard Davies:
https://drawasamaniac.com/2012/12/the-art-of-richard-davies.html
https://theinspirationgrid.com/digital-illustrations-by-richard-davies/
https://www.behance.net/gallery/2595061/Music-portraits
www.behance.net/gallery/2050247/Steve-Jobs
Find one PORTRAIT by this Digital Artist
Copy and Paste it into a Google Doc or Word document.
Answer the following questions about the work:
Turn into Google Classroom when you have it finished. WORTH 25 points
Now go find a portrait of a person you would like to use for this assignment. Make sure the portrait has a large amount of pixels. At least 2MP or higher is needed.
https://drawasamaniac.com/2012/12/the-art-of-richard-davies.html
https://theinspirationgrid.com/digital-illustrations-by-richard-davies/
https://www.behance.net/gallery/2595061/Music-portraits
www.behance.net/gallery/2050247/Steve-Jobs
Find one PORTRAIT by this Digital Artist
Copy and Paste it into a Google Doc or Word document.
Answer the following questions about the work:
- What do you notice about the portrait you selected? Describe it?
- Can you tell me what types of art elements he used to create this portrait?
- What specific techniques do you think he used, or how it could have been made (digital techniques)?
Turn into Google Classroom when you have it finished. WORTH 25 points
Now go find a portrait of a person you would like to use for this assignment. Make sure the portrait has a large amount of pixels. At least 2MP or higher is needed.
(Part 2) COREL PAINTER
Project Requirements & Objectives: Students will...
Directions
Using a photograph for reference, create a full color digital portrait painting using the Oil Palette Knife, and other brushes for details (eyes, nose, mouth, hair, eyebrows) and the background brushwork in Corel Painter.
Use Google images to locate the photo.
The picture must be 1600 x 1200 pixels or larger. It MUST be a picture of persons face!
Narrow down the search results by using Google Images > Search Tools > Larger Than > 2MP (1600 x 1200)
- Develop skills in digital painting and illustration – from a photograph
- Look at the digital portraits of UK digital artist Richard Davies
- Produce a digital portrait painting illustration (smudge technique) using Corel Painter and Adobe Photoshop with Wacom drawing tablet that shows 3 dimensional qualities.
- Develop skills in shading - use a variety of painting techniques, including color mixing and blending.
- Use multiple Layering techniques in Corel Painter and Photoshop
- Add additional layers (textures, paint drips, splatters, PS brushes, color adjustments) Layer blending modes with Adobe Photoshop
- Save correctly to drive for grading.
Directions
Using a photograph for reference, create a full color digital portrait painting using the Oil Palette Knife, and other brushes for details (eyes, nose, mouth, hair, eyebrows) and the background brushwork in Corel Painter.
Use Google images to locate the photo.
The picture must be 1600 x 1200 pixels or larger. It MUST be a picture of persons face!
Narrow down the search results by using Google Images > Search Tools > Larger Than > 2MP (1600 x 1200)
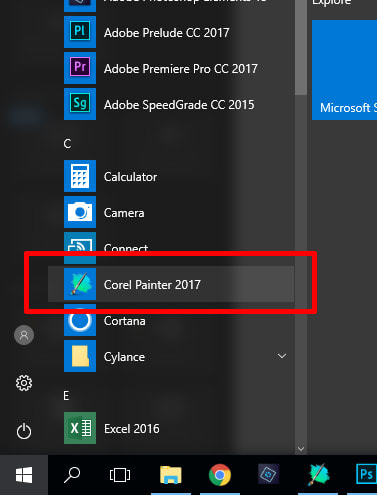
Step 1
Open Painter located in the Programs folder
Open Painter located in the Programs folder
Step 2
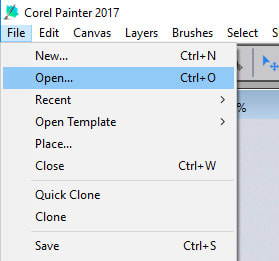
File Menu > Open or on the Open Another Document
Find the image you saved to your computer from the Internet and open it up.
File Menu > Open or on the Open Another Document
Find the image you saved to your computer from the Internet and open it up.
Step 3
Bring out the Layers palette if it is not open already. Window > Arrange Palettes > Default
Bring out the Layers palette if it is not open already. Window > Arrange Palettes > Default
Step 4
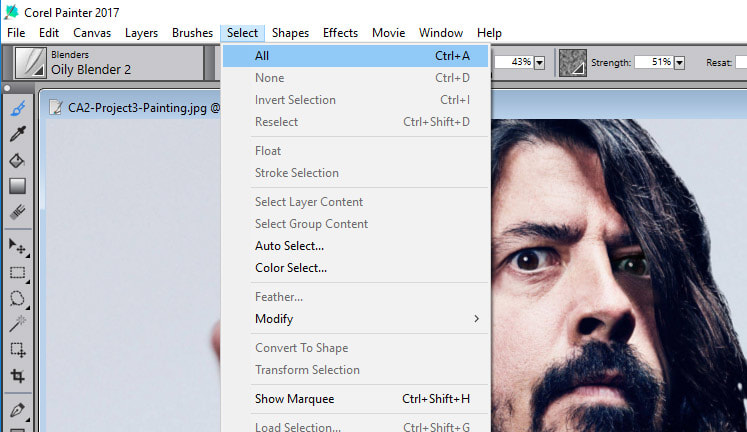
Go to Select > All
Go to Select > All
Step 5
Go to Edit > Copy. Then Edit > Paste in Place. It will duplicate the photo and place it on a new layer.
Go to Edit > Copy. Then Edit > Paste in Place. It will duplicate the photo and place it on a new layer.
Step 6
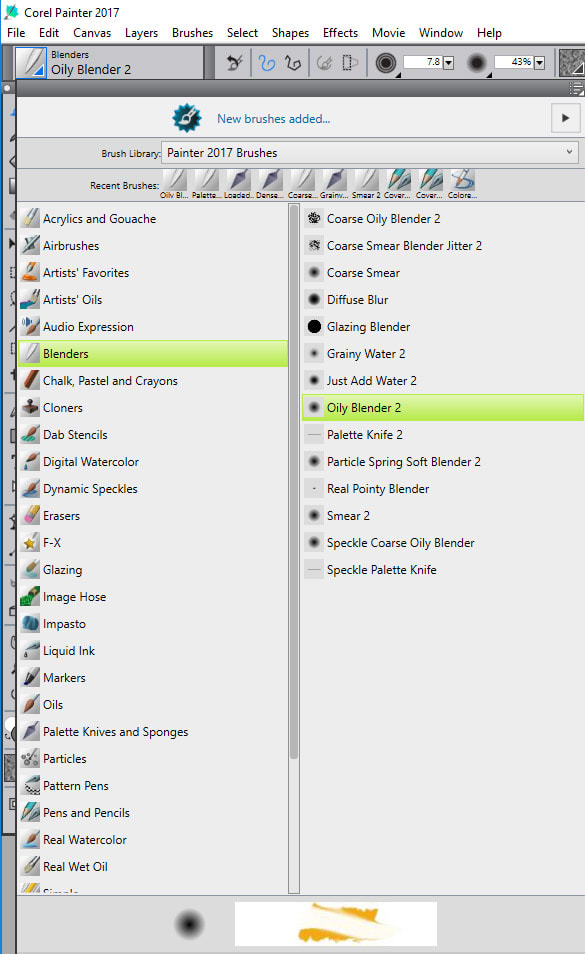
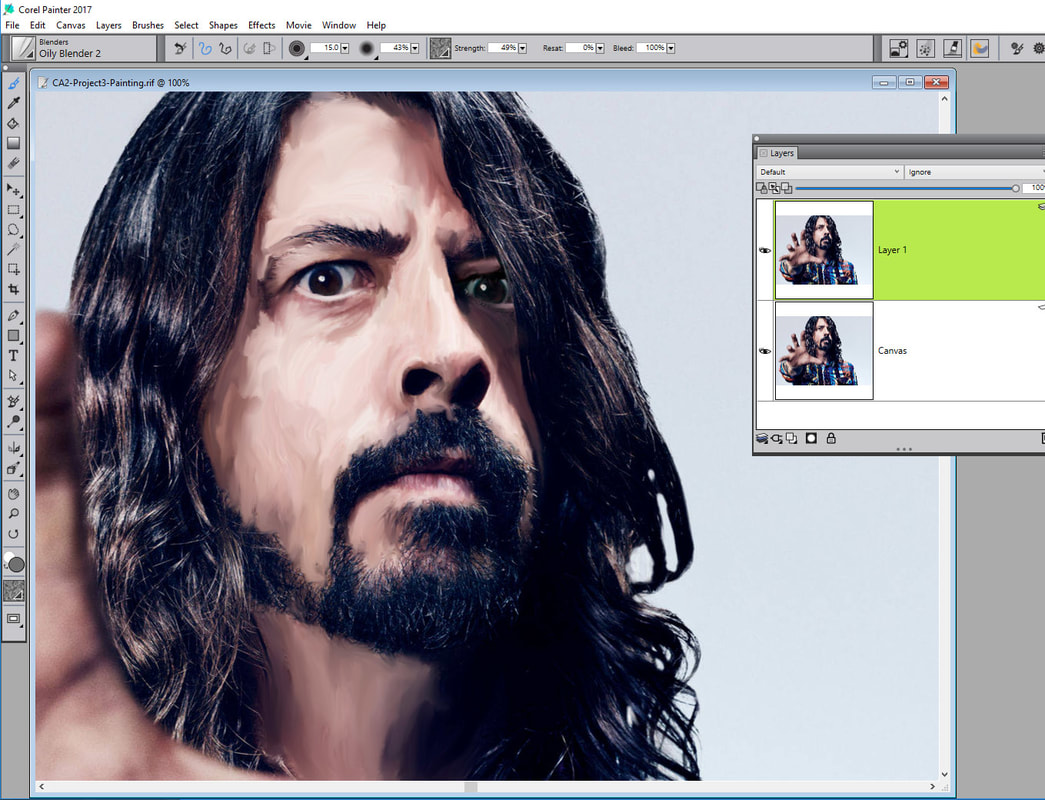
Select the Brush Tool and then select the Oily Blender 2 from the Blenders Brush
Select the Brush Tool and then select the Oily Blender 2 from the Blenders Brush
Step 7
Save this project following info below:
File Name: YOUR LAST NAME_Digital Painting
Save as type: Select Photoshop (*psd) from the drop down menu.
If you don't do this you will have to start over : (
Save it to your Google Drive folder for this class
Then click the Save button
Save this project following info below:
File Name: YOUR LAST NAME_Digital Painting
Save as type: Select Photoshop (*psd) from the drop down menu.
If you don't do this you will have to start over : (
Save it to your Google Drive folder for this class
Then click the Save button
Step 8
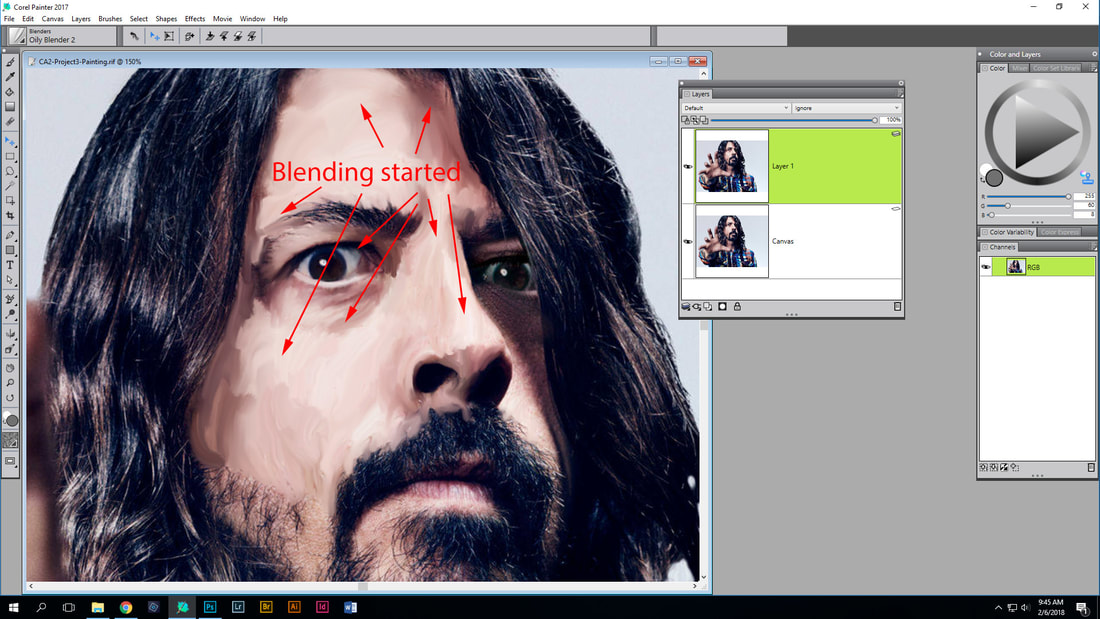
Using the brush at different sizes between 5 (smaller details) and 15 (larger open areas like the forehead and cheeks) begin painting (smudging the color already there) carefully following the colors and values of the photo.
Using the brush at different sizes between 5 (smaller details) and 15 (larger open areas like the forehead and cheeks) begin painting (smudging the color already there) carefully following the colors and values of the photo.

Step 9
Only paint the skin, eyes, lips. Don't paint the hair, facial hair (eyebrows, beard, etc.)
Only paint the skin, eyes, lips. Don't paint the hair, facial hair (eyebrows, beard, etc.)
Step 10
When you are finished painting the figure with the Blenders Brush > Oily Blender 2 it should look something like this:
When you are finished painting the figure with the Blenders Brush > Oily Blender 2 it should look something like this:
Step 11
Save this project AGAIN
File > Save
Save this project AGAIN
File > Save
(Part 3) PHOTOSHOP
Step 12
Open Adobe Photoshop CC
Open Adobe Photoshop CC
Step 13
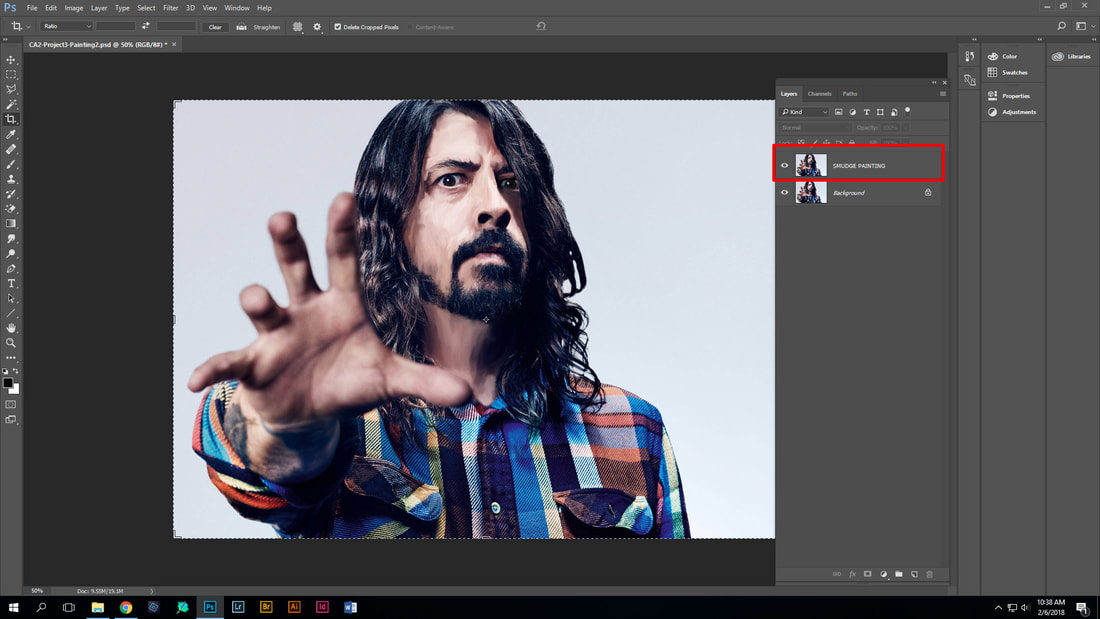
File > Open the project you began in Corel Painter.
Rename Layer 1 (double click on layer 1 ) as SMUDGE PAINTING
File > Open the project you began in Corel Painter.
Rename Layer 1 (double click on layer 1 ) as SMUDGE PAINTING
Step 14
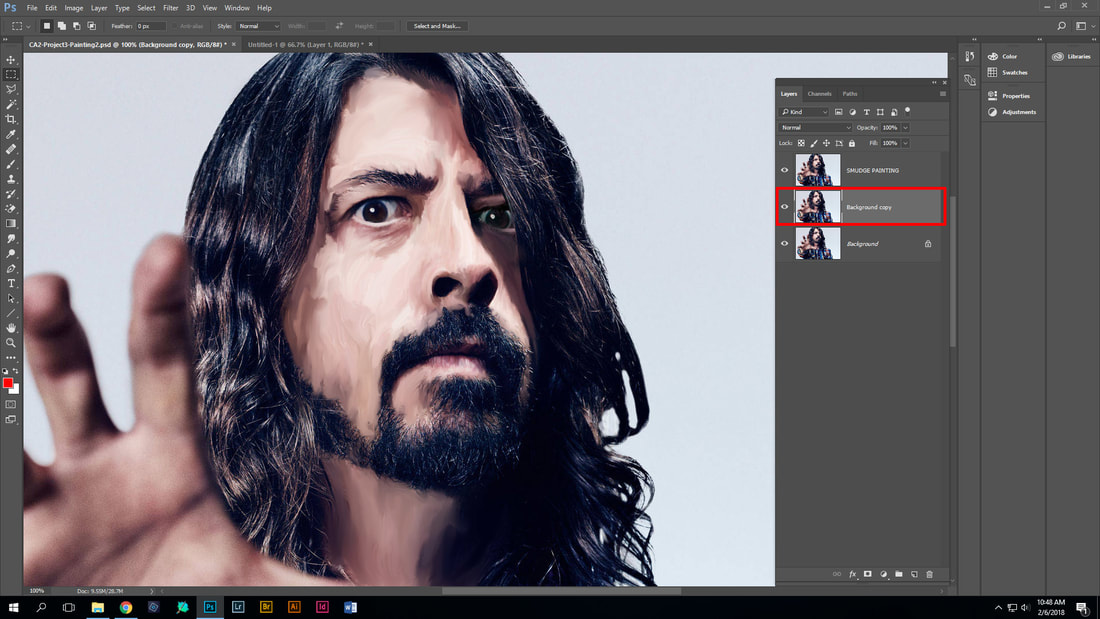
Duplicate the background layer (Ctrl + J)
Duplicate the background layer (Ctrl + J)
Step 15
Change the name of this layer to OIL PAINT FILTER
Change the name of this layer to OIL PAINT FILTER

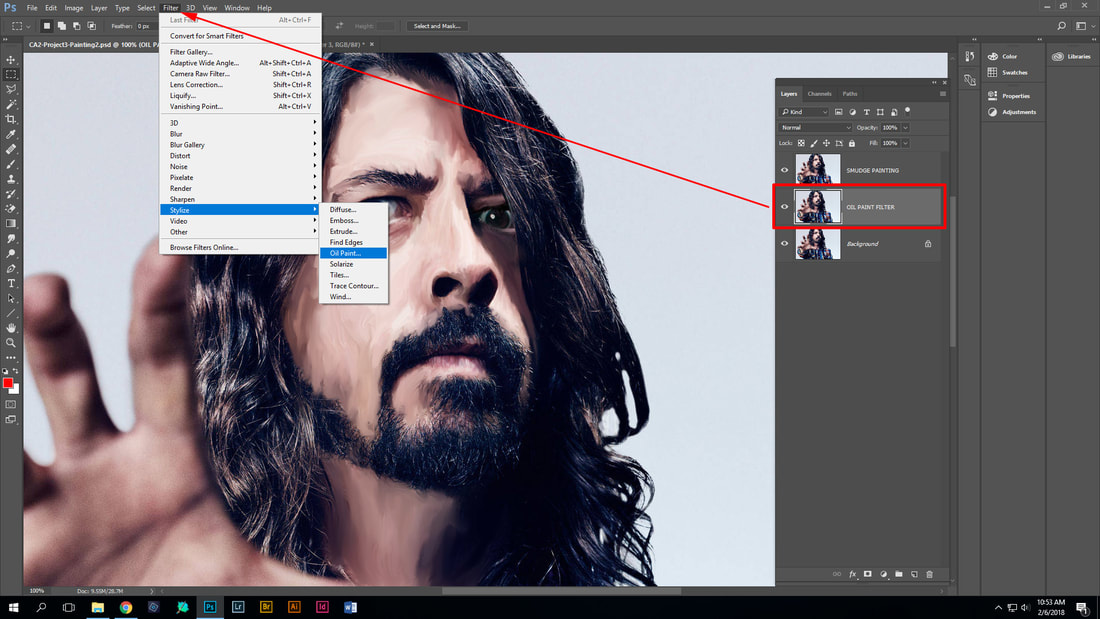
Step 16
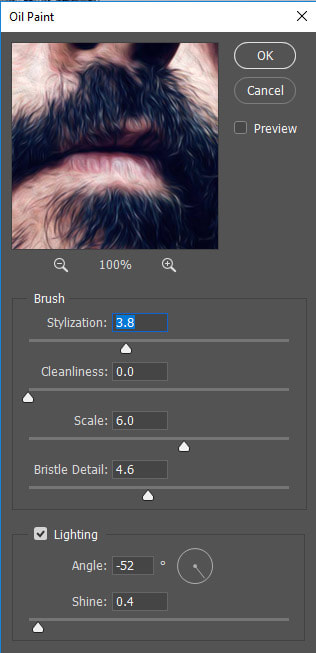
With this layer selected go to the Filter Menu > Oil Paint
With this layer selected go to the Filter Menu > Oil Paint
Step 17
Move the preview box to the see the persons hair. Adjust the sliders until it looks like the example. You're looking for something like the example here.
YOUR ONLY LOOKING AT THE HAIR! DON"T WORRY ABOUT THE SKIN, EYES, ETC.
Move the preview box to the see the persons hair. Adjust the sliders until it looks like the example. You're looking for something like the example here.
YOUR ONLY LOOKING AT THE HAIR! DON"T WORRY ABOUT THE SKIN, EYES, ETC.
Step 18
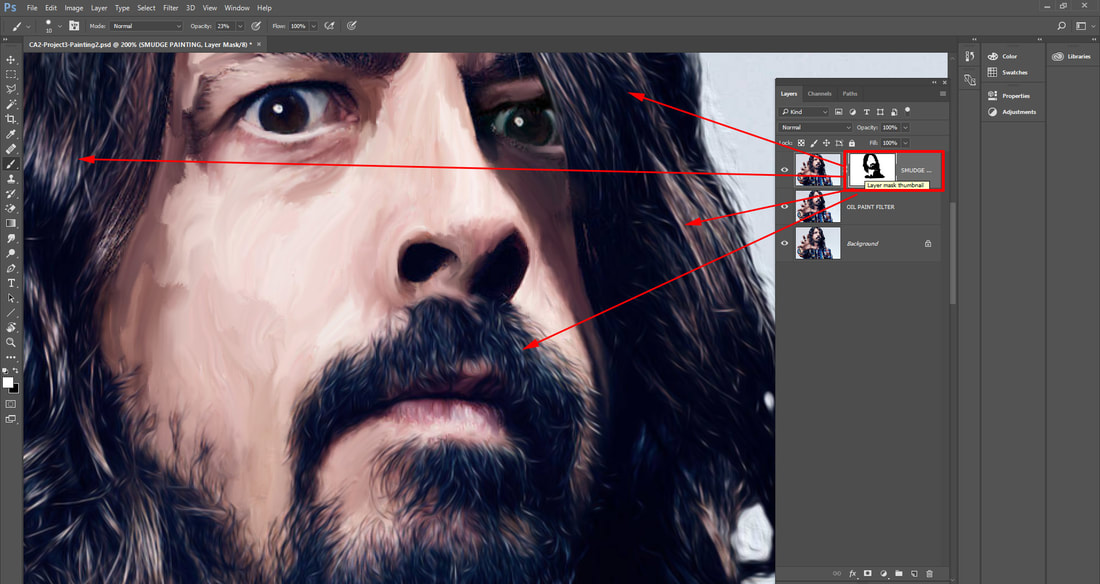
Add a Layer Mask to the SMUDGE LAYER and paint with Paintbrush.
Using Black as your main color paint over any of the areas of hair.
Zoom in, lower the opacity of the brush to around 35%.
This will now show ONLY the OIL FILTER in these areas.
Add a Layer Mask to the SMUDGE LAYER and paint with Paintbrush.
Using Black as your main color paint over any of the areas of hair.
Zoom in, lower the opacity of the brush to around 35%.
This will now show ONLY the OIL FILTER in these areas.
Step 19
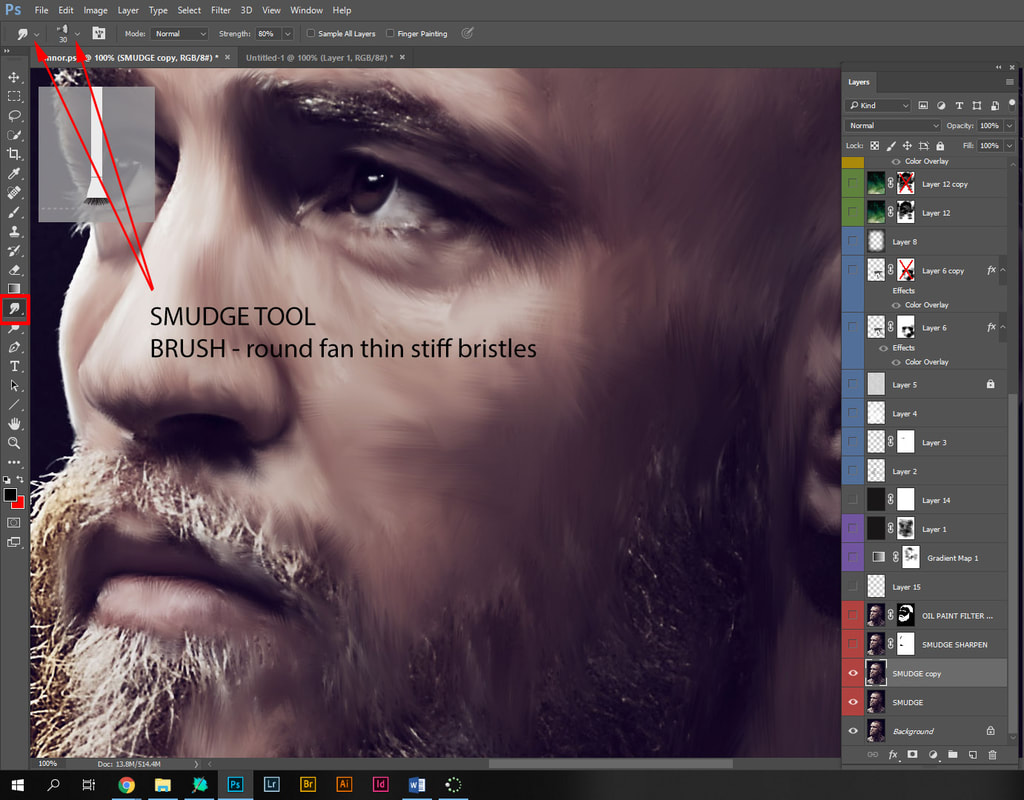
Copy the SMUDGE LAYER
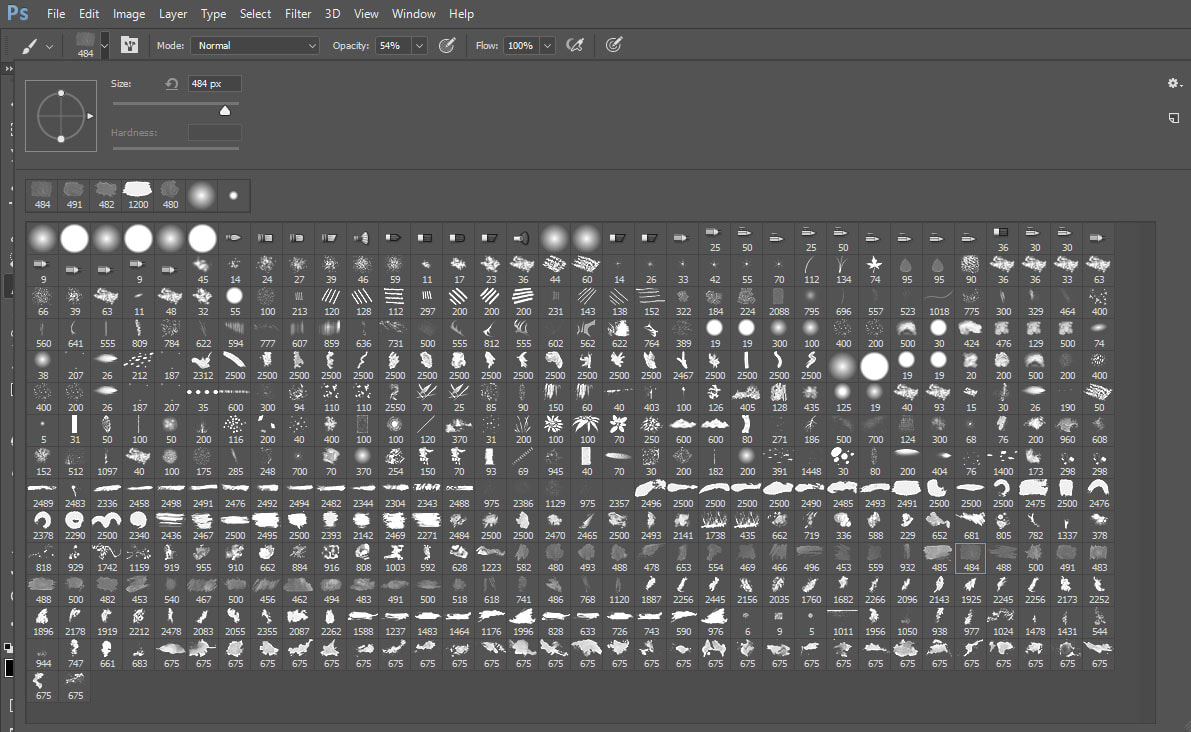
Use the Smudge Tool
Brush - Round Fan think stiff bristles
Copy the SMUDGE LAYER
Use the Smudge Tool
Brush - Round Fan think stiff bristles
Step 20
DEMOS will be given on the completion steps:
DEMOS will be given on the completion steps:
- Add additional layers (textures, paint drips, splatters, PS brushes, color grading adjustments) Layer blending modes with Adobe Photoshop